Hey there! You're wondering if it's better to refill your ink pad or buy a new one? You've got the right idea – refilling your handheld ink pad is a smart move for your wallet and the planet! Instead of constantly buying new pads, a simple refill bottle can keep your stamping going strong. Let's dive into some handy tips and tricks to make the process smooth and mess-free.
That trusty handheld ink pad is essential for so many crafts and tasks, but running out of ink can bring your creativity to a halt. Fear not! Refilling is easier than you might think.
What You'll Need:
- Your nearly empty ink pad

- A bottle of ink specifically designed for stamp pads (dye-based or pigment-based, depending on your original ink)
- A few pieces of scrap paper or cardboard (like old business cards)
- Gloves (optional, but recommended to keep your hands clean! Especially if you have beautiful nails, the ink is fabulous at getting stuck in all those groves - ask us know we know! 🫣)
The Refilling Process: Step-by-Step
-
Identify Your Ink Type: Before you start, take a peek at the label of your original ink pad or any previous refill bottles you might have used. It's generally best to stick with the same type of ink (dye-based or pigment-based) for the best results. Mixing ink types can sometimes lead to undesirable outcomes.
-
Prepare Your Workspace: Find a well-ventilated area and cover your work surface with some scrap paper or an old cloth to protect it from any accidental spills.

-
Open Your Ink Pad: Carefully open your handheld ink pad or remove the ink pad from your self-inking stamp.
-
Start Small with the Ink: Resist the urge to pour in a lot of ink at once. It's much easier to add more than it is to remove excess. Begin by adding just a small amount of ink – about a quarter of the bottle, is a great starting point for a standard-sized pad. Apply the ink in a few small drops across the surface of the pad, trying to distribute it somewhat evenly.


-
Gentle Distribution is Key: Now, grab one of your pieces of scrap cardboard or a business card. Gently run it across the surface of the ink pad. This helps to spread the ink evenly across the foam or felt without saturating one area. Use light pressure and repeat this process a few times in different directions.

-
The "Test Run": Take another piece of scrap paper and lightly press your stamp onto the inked pad, then onto the paper. This will show you how well the ink has distributed. If the impression is too light or patchy, add a few more drops of ink and repeat the spreading process.
-
Patience is a Virtue: Avoid the temptation to immediately use your newly refilled ink pad on your important project. Give the ink a few minutes to fully absorb into the pad.
-
Wipe Away Excess (If Necessary): If you accidentally added too much ink and see pooling on the surface, gently blot the excess with a clean piece of scrap paper or a paper towel. Avoid pressing too hard, as you don't want to remove all the new ink.
-
Clean Up: If you used gloves, dispose of them. Wipe off any stray ink from the edges of the ink pad case or your work surface.
Bonus Tips for Ink Pad Refilling Success:
- Storage Matters: Store your ink pads flat with the lid tightly closed to prevent the ink from drying out.
- Listen to Your Pad: If your ink pad feels overly squishy or leaves very wet, blurry impressions, you've likely added too much ink. Be patient and blot away the excess.
- Consider the Ink Pad Material: Different ink pads (foam, felt, etc.) might absorb ink at slightly different rates. Adjust the amount of ink you add accordingly.
- Don't Mix Old and New Inks: While refilling, try not to disturb any dried-up ink already in the pad, as this can sometimes create unevenness.
- Invest in Quality Ink: Using a good quality refill ink will ensure vibrant and long-lasting stamped images.
Refilling your handheld ink pad is a simple yet effective way to save money and reduce waste. With a little care and these handy tips, you can keep your stamping projects vibrant and your creative flow uninterrupted. Happy stamping!

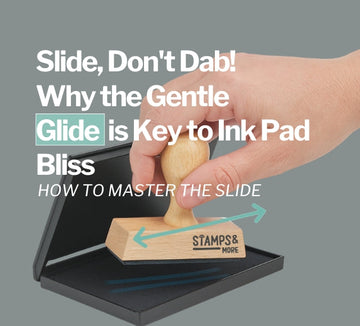
Slide, Don't Dab! Why the Gentle Glide is Key to Ink Pad Bliss


