We've all been there. You're ready to add that perfect stamped image to your latest crafting project. You grab your ink pad and... thump, thump, thump. You vigorously dab your stamp onto the surface, hoping to get a good, even coat of ink. But more often than not, you end up with uneven inking, splotches, and frustration.

Well, friends, it's time to ditch the dab and embrace the slide! Trust me, this simple change in technique will revolutionise your stamping and lead to cleaner, crisper impressions every time.
So, why is sliding so much better than dabbing and pressing? Let's break it down:
1. Even Ink Distribution:
This is the biggest benefit. When you dab and press, you're applying uneven pressure to the ink pad. This can lead to some areas getting overloaded with ink while others remain dry. The result? A patchy, inconsistent image on your project.
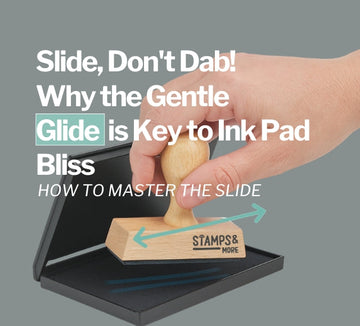
Sliding, on the other hand, allows the stamp surface to gently glide across the ink pad. This distributes the ink more evenly across the entire stamp, ensuring that all the intricate details pick up the perfect amount of pigment. Think of it like gently rolling a paint roller – you get a smooth, consistent coat.
2. Prevents Ink Pooling and Blobs:
Dabbing often forces the ink to pool in certain areas of the stamp, especially if you're using a juicy ink pad. When you then press this overloaded stamp onto your paper, you're likely to get unsightly blobs and blurry edges.
The sliding motion picks up a thinner, more consistent layer of ink, minimizing the chances of these frustrating ink puddles. You'll achieve cleaner lines and sharper details in your stamped images.
3. Extends the Life of Your Ink Pad:

Think about the constant pressure you're applying when you dab. This can actually damage the surface of your ink pad over time, creating indentations and unevenness. These imperfections will then translate to uneven inking on your stamps.

Sliding is a much gentler approach. It minimizes the direct pressure on any single point of the ink pad, helping to maintain
its smooth, even surface for longer. This means your ink pad will last longer and continue to provide excellent results.
4. Better for Detailed Stamps:
Intricate stamp designs with fine lines and small details are particularly susceptible to the pitfalls of dabbing. The uneven pressure can cause ink to squeeze into the tiny crevices, leading to a smudged or filled-in impression.
The gentle, even contact of the sliding technique allows the ink to adhere precisely to the raised areas of the stamp, capturing all those beautiful details without overwhelming them.
How to Master the Slide:
It's simple! Here's how to achieve the perfect ink pad glide:
- Hold your stamp firmly: Grip your stamp comfortably but securely.
- Lightly touch the ink pad: Position your stamp so that the entire surface will make contact with the ink.
-
Gently slide: In one smooth motion, slide the stamp across the surface of the ink pad. Don't press down hard! Let
the weight of the stamp do the work.

- Repeat if necessary: For larger stamps, you might need to slide back and forth once or twice to ensure full coverage.
- Test it out: Always test your inked stamp on scrap paper first to check the ink coverage before applying it to your final project.
The Takeaway:
While dabbing might seem like the intuitive way to ink a stamp, the gentle slide is the secret weapon for achieving crisp, even, and professional-looking stamped images. It's kinder to your ink pads and ultimately leads to a much more enjoyable and successful crafting experience. So, the next time you reach for your ink pad, remember: slide, don't dab! Your projects will thank you for it.
Happy stamping!


